As you know Scrap Girls is partnering with Silhouette to bring you inspiring new tutorials and great coupons and promotions on Silhouette’s great line of products! This month Silhouette is offering discounts on both their popular Silhouette machines as well as their Premium Vinyl. Check out the ad at the end of the tutorial; and make sure to use the Code: SCRAPGIRLS during checkout to receive your discount!
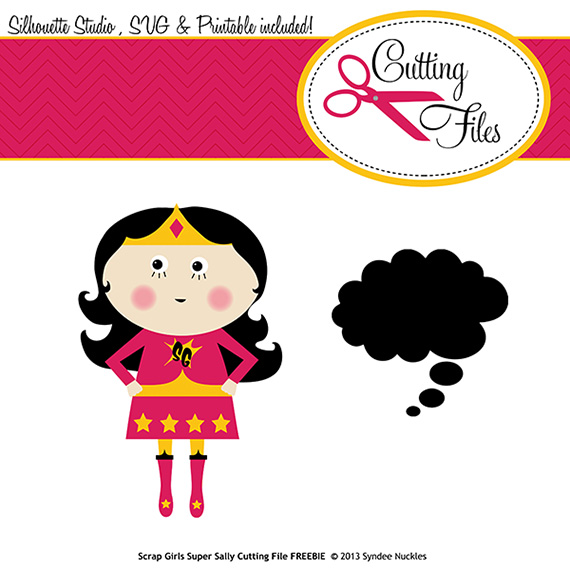
Lori Aragon LOVES her Silhouette Cameo and created this wonderful tutorial just for you using the Super Sally FREE cutting file above to make a vinyl decal, but HURRY Sally will only be available FREE for a short time! Download the FREEBIE below.
*** Please note: This freebie has expired.
Super Sally Vinyl on a Laptop? Oh Yeah!
It’s a bird…it’s a plane… No! It’s Super Sally!!! Who??? Just wait until you see her – she’s out of this world : )
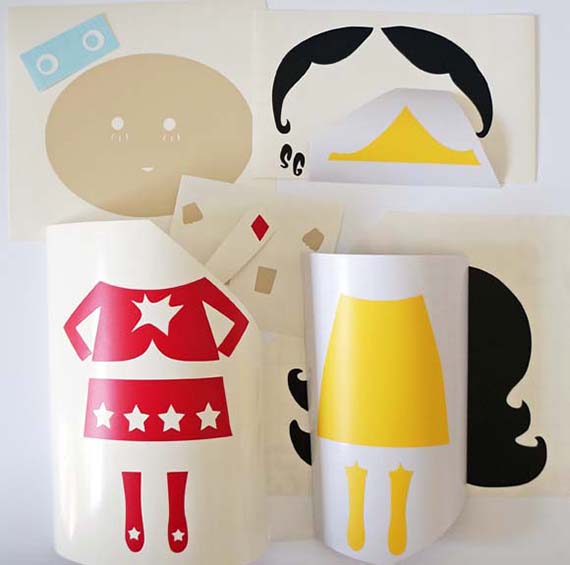
I’ve been having a blast with my Silhouette Cameo, vinyl and Syndee Nuckles’ ADORABLE Super Sally Cut File. She’s not only a cut file though. You can print her out, print and cut, or use her in your digital scrapbooking projects! I’ve used vinyl today, but a paper piecing card or project would be oh-so-cute
Digital scrapbooking supplies used:
Super Sally Cutting File
Supplies used:
Digital scrapbooking supplies
Silhouette Cameo and Silhouette Studio Software
Silhouette Vinyl – I used Strawberry, Yellow, Black, White and Sand
Transfer Paper
Scraper Tool
Scissors
White Acrylic Paint and Stylus
Cream Chalk and Applicator
Instructions:
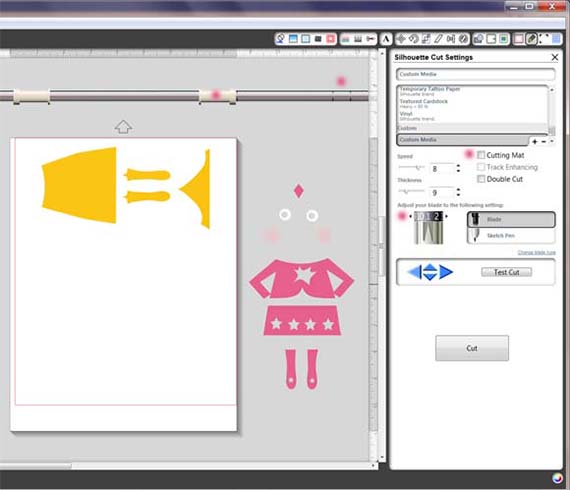
To begin, I downloaded Syndee’s FREE Cut File. I saved it where I could find it on my computer LOL, and opened it up in Silhouette Studio software. I decided I wanted to start with the black layers, so I ungrouped the image and placed those pieces on the ‘mat.’ The rest of her is off to the side for cutting later…
Here you see that I want to get the most out of my vinyl, so to get both pieces in I rotated the front hair piece (which is grouped together).

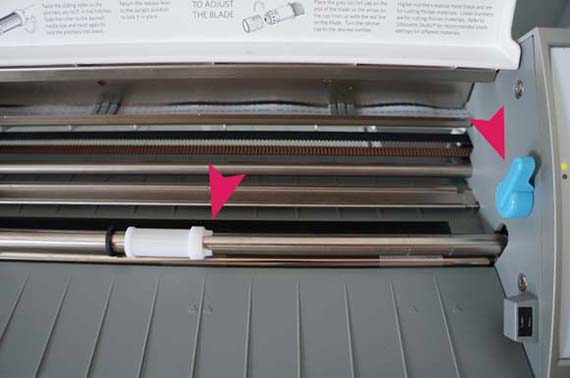
Everything was already set to cut, so next all I had to do was adjust the Cut Settings in my software. I’m using vinyl as the media, so I clicked on Vinyl. The blade settings automatically adjust, so I followed the recommendation and changed my cutting blade in my Cameo to 2. Since I used my cutting mat (placing a scrap piece of vinyl on it) the Cutting Mat box is checked. One other thing to notice here is where the right roller is. You’ll see a difference later on in this tutorial!

Next comes the face : ) I simply moved the black pieces to the other side and slipped the flesh colors onto the ‘mat.’ Notice that I have grouped both hands together and then grouped both legs together. I figured it would be easier when I go to transfer them.

Here comes the yellow! I’m really not trying to bore you LOL… there is a method to my madness bwahahahahahah!!!
I have some very interesting information to share with you. So far, I’ve used scrap pieces of vinyl and my cutting mat, which work great by the way! For this next cut, I decided to use the vinyl right from the roll. You’ll notice that some things have changed in the software.
First, I UNchecked Cutting Mat; next I changed the blade setting to 1. Why? Because I tried with the recommended 2 (which worked GREAT with every other color) but it cut right through the backing paper – TWICE hahaha. Yeah, I thought maybe I made some kind of mistake the first time, so I tried again… nope!
Note: The yellow vinyl is Silhouette brand, but I purchased it from Amazon since Silhouette didn’t have any in stock. I can’t tell you why it’s different, but I do know that it’s A LOT thinner and it doesn’t have the sticking power that the others do 🙁 Just be careful where you purchase your vinyl. Me? I’ll never purchase it from Amazon again, that’s for sure!
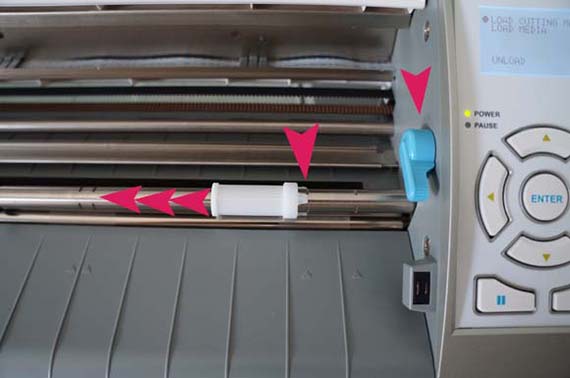
The last thing I want you to notice in the photo is that when I UNchecked Cutting Mat, the roller on the right side moves to the left. Cool huh?
To move the roller on your Cameo, you need to push the blue lever on the right side down. This releases the steel bar so you can make adjustments. Only the right roller moves… leave the left alone.
Twist the white roller so it lifts out of the grooves. You may need to work at this a bit until it loosens. Slide it to the left until you reach the next set of grooves and twist in place. It will lock in. Push the blue lever back up and you’re good to go!
For my project, I wanted a white background to make Super Sally look like a sticker. To do that, I clicked on the Offset Button at the top of the screen, clicked on Offset and hit Apply. If you’d like a thicker or thinner offset, simply adjust the Offset Distance.

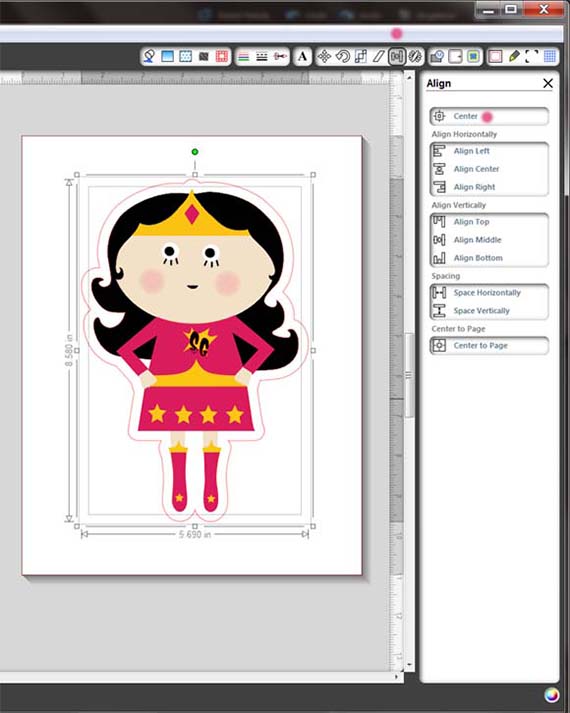
Just in case you’ve moved your image for some reason…although I’d NEVER do that *blush.* Here’s a simple trick to make sure everything is centered. Select both image and offset by clicking your mouse at the top (left or right) corner and drag to the bottom (left or right) opposite corner, making a box – then release mouse – voila! selected!!! Now go to the Align Button at the top right of your screen, click on Center and BAM… you’re centered : )
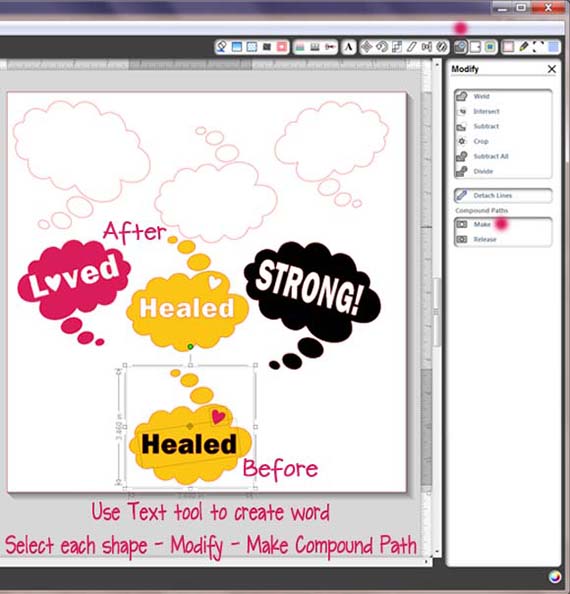
Using Syndee’s Bubble Cut Files, I resized and rotated how I wanted them on my screen first, so there wouldn’t be any surprises when I transferred them next to Super Sally. She’s so particular, you know! Next, I filled them with color so I’d know which color vinyl to use. Using the text tool, I typed each word, resizing as necessary to fit inside each bubble. Making sure that both the text and the bubble were selected, I went to the Modify Button and hit Make Compound Path. Now it’s a see through!!!
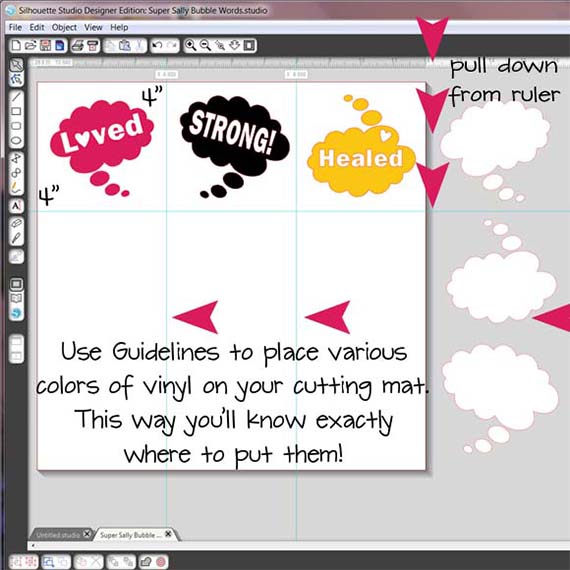
Here’s how you can make guidelines on your screen so you can use scrap pieces on your cutting mat and know where to place everything! Simply pull down (or across) from the ruler and KAPOW you have a blue guideline…

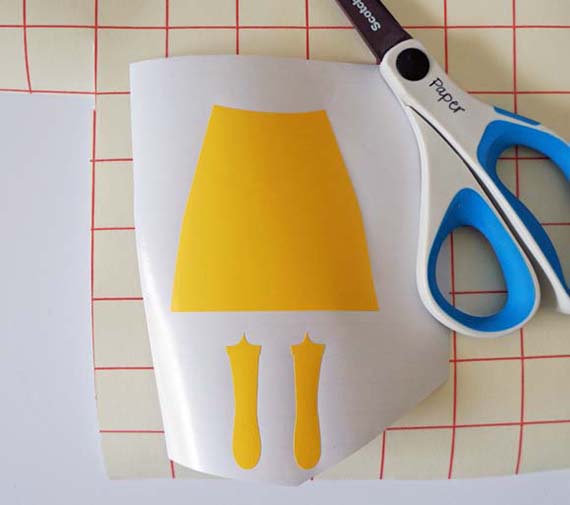
Are you still reading? We are finally at the “all cut out and ready to weed” moment! Get out your weeding tool and remove the negative images from your vinyl.

Here’s all the cute li’l layers you’ll need. It just looks like a lot.
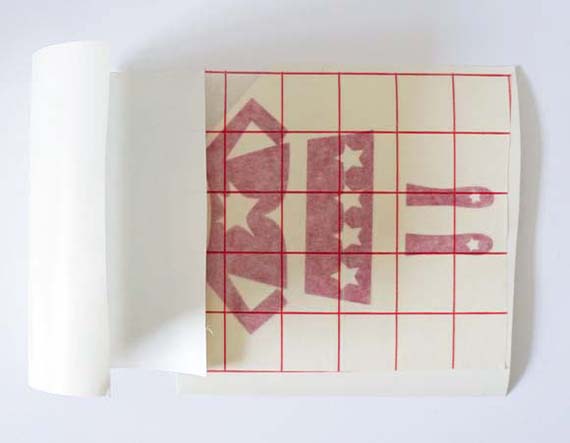
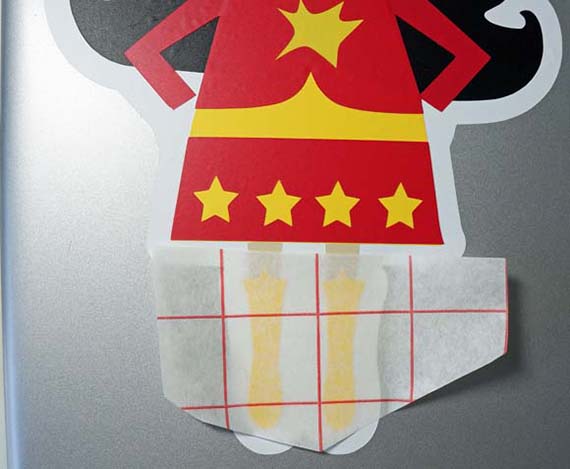
Next comes the transfer paper. Using scissors, cut out a piece to cover your vinyl.
Peel the backing off from one end of the transfer paper and place the sticky side of the transfer paper (in this case, with the grid) onto your vinyl. Smooth down as you continue to pull off the backing paper.

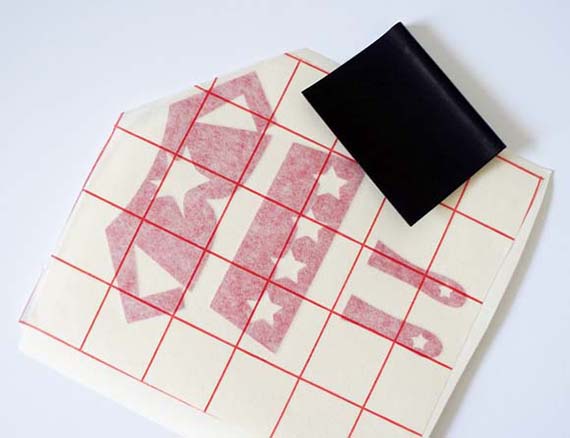
Using your scraping tool, smooth out any bubbles, making sure the transfer paper is attached firmly to the vinyl.
Next you’ll peel off the backing paper from the VINYL. Go slow, making sure the vinyl is sticking to the transfer paper. If not, smooth back down with your tool and try again. Once in awhile I help things along and peel a little vinyl from it’s backing – sometimes it’s just too stubborn to let go!

All of the pieces have now been transferred onto the transfer paper and I’m placing the last few vinyl layers on Super Sally! Placing the sticky side down, again using your scraping tool, smooth out and press down the vinyl onto your project.
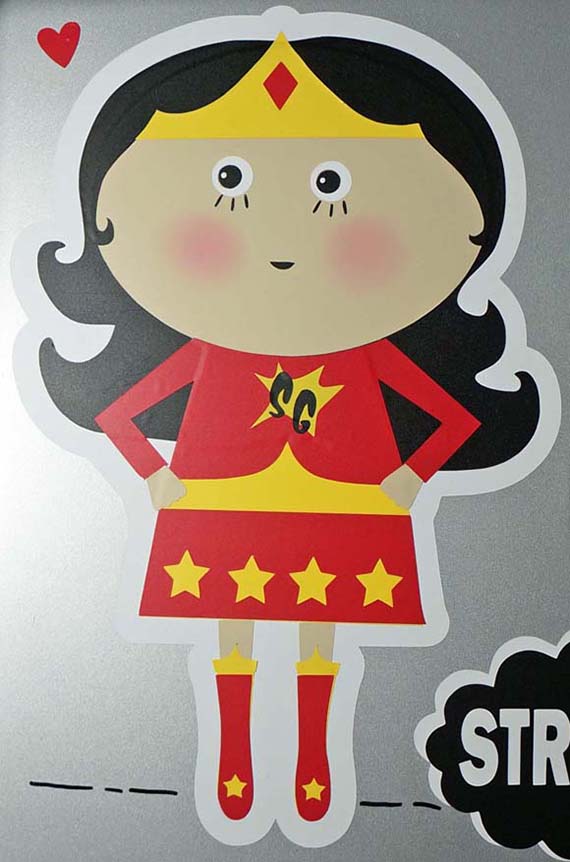
Ta Da!!! Here’s Super Sally all put together. Isn’t she super? To get the highlight in her eyes, I used my stylus and a dot of white acrylic paint. For her rosy cheeks, I used cream chalk with the applicator in the set and lightly rubbed into the vinyl! Sweet.
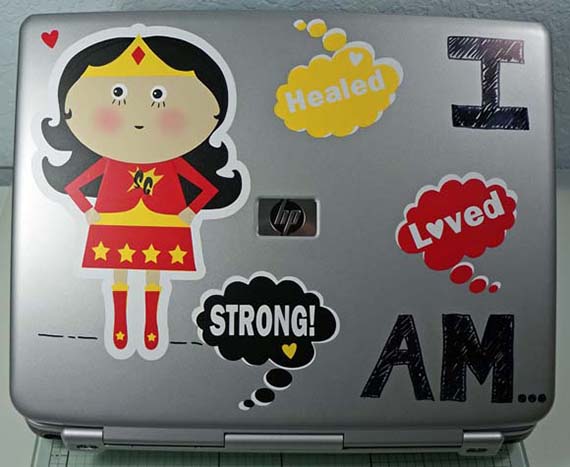
…and the final product. I chose to use Super Sally as a sort of Project Life page on my laptop. “I AM… Healed, Loved and STRONG!” This was a fun surface to create on! Now I have a great reminder every time I see her.
Now it’s your turn! We’d love to see what surfaces you come up with using these FREE cut files. Please share with us at Scrap Girls Hybrid Gallery. Enjoy!!!
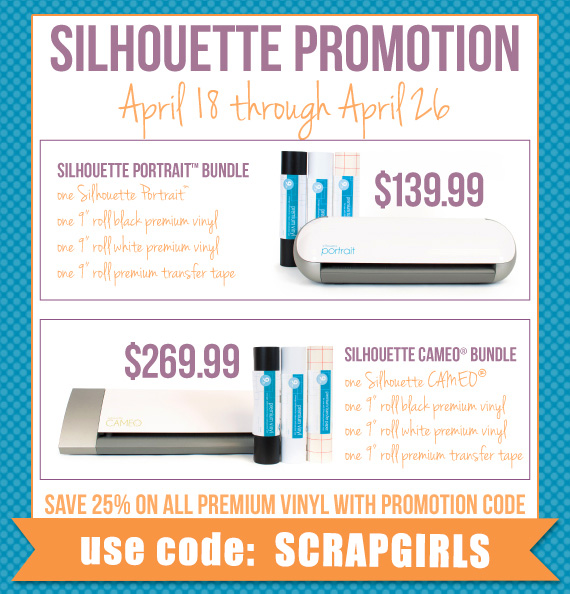
Check out these great deals on the Silhouette Cameo and Silhouette Portrait as well as their Premium Vinyl! Please click HERE to take advantage of this month’s discount and don’t forget to enter SCRAPGIRLS as the promo code. Hurry this offer is only good thru April 26th!
Please note that the vinyl discounted in the promotion is all 9” by 10’. The vinyl is actually discounted BIG TIME. It used to cost $14.99. Silhouette reduced that price to $9.99 as it is. The 25% promotional discount is on the previously discounted $9.99 price and so, comparing it to the old $14.99 price, the discount is HUGE!
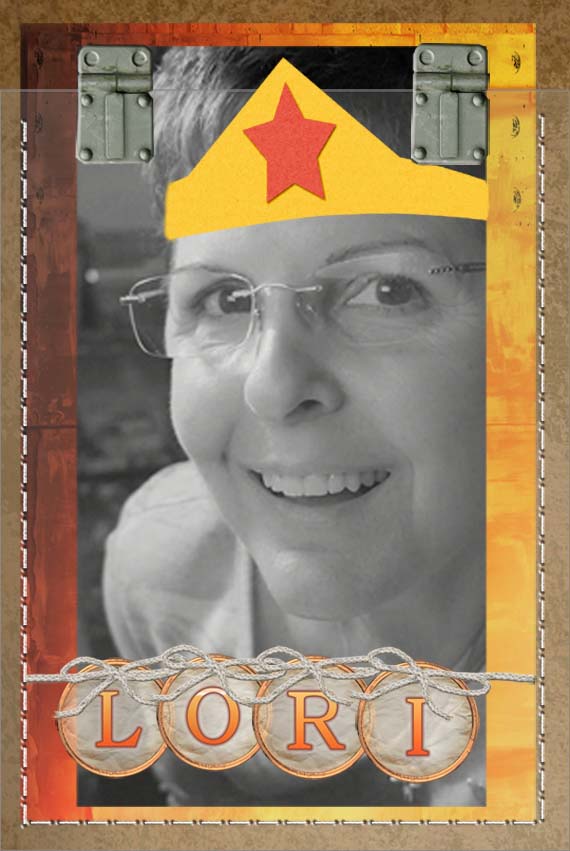
Tutorial written by Lori Aragon