
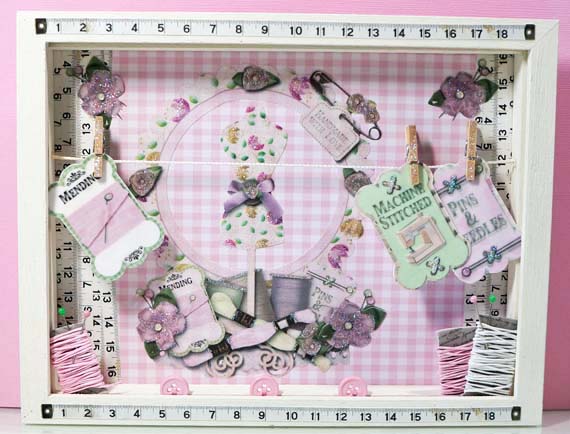
We are thrilled to bring you this great tutorial from Lori Aragon using Silhouette’s Fabric Interfacing! Imagine all the cool and pretty things you can make using fabric! The possibilities are endless! Make sure to check out the promotion at the bottom of the post for some great deals on Silhouette Electronic Cutting tools and Fabric Interfacing bundles!
Oh my! Have I been having sew much fun with fabric lately!!! I am super excited to share my project with you today using Scrap Girls Digital Scrapbooking Supplies, Silhouette Clean Cut Fabric Interfacing and fabric. Yes, you read that right, I paired Jo Corne’s Sew Much More digital kit – papers, embellishments and word art with fabric. Have I got your interest piqued? Read on to find out how I did it!
Digital scrapbooking supplies used for this project:
Sew Much More digital kit
Additional supplies used for this project:
Silhouette Clean Cut Fabric Interfacing
White Muslin
Silhouette Cameo and Software
Photoshop Elements 10
Iron, Ironing Board and Clean Cloth
Paper Floss
Scissors
Best Glue Ever
Craft Smart Vanilla Acrylic Paint
Paint Brush
Frame with clothesline purchased at Michael’s
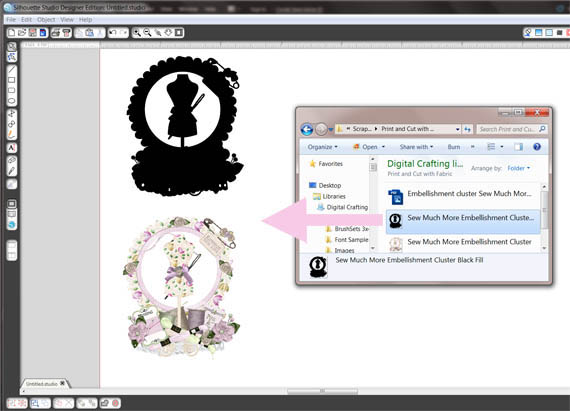
Step 1: Design elements for main image in Photoshop (or other software). Save as png file. Here’s mine…

Step 2: Change image to Black Fill in Photoshop (or other software). Give this file a different name and Save. I usually just keep the file name and add BLACK FILL at the end. Be sure to save as PNG.
Drag and drop both images in Silhouette Software.
Step 3: Working with the Black Fill image, click on the “Trace” Button at the top right and click on “Select Trace Area.” Create a box around your image.
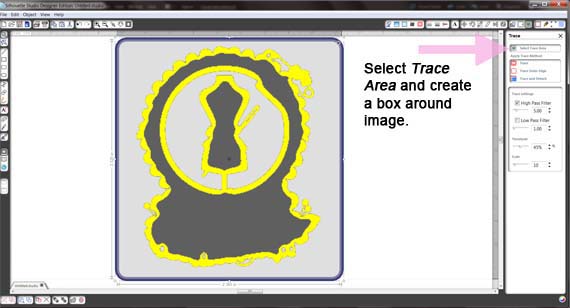
Step 4: Uncheck “High Pass Filter” and if necessary to fill the entire image with yellow, increase the “Threshold.” Click on “Trace.” If your image doesn’t have any inner pieces to cut, click on “Trace Outer Edge.”

Step 5: Move the Black Fill image to the side and voila! you have your new cut file!!!
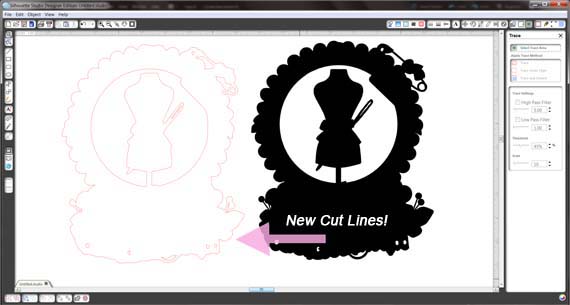
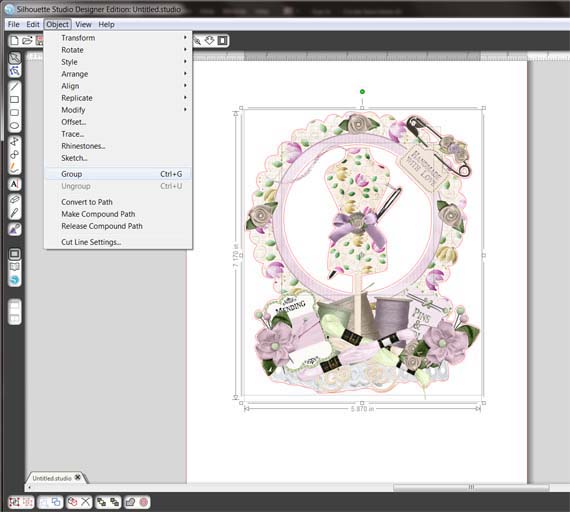
Step Six: Grab your colored image and place over the new cut lines. You don’t have to be precise at this point. Select both the image and cut lines, open the “Align” window and click on “Center.” Next group together by clicking on “Object” and “Group” (or right click and group). Resize if desired.
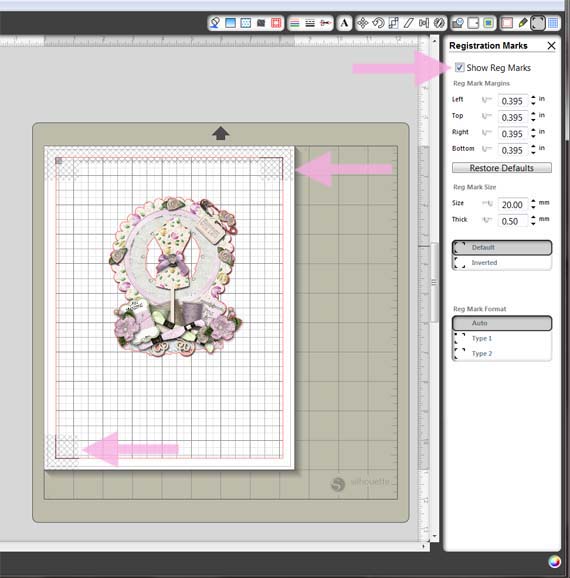
Step 7: To be able to print, you’ll need to turn on the registration marks. Go to “Open the Registration Marks” in the upper right corner, and click on the “Show Reg Marks” box. Make sure your image(s) fit within the boundaries of the registration box. If necessary, you can make the registration marks smaller by lowering the number of the “Left” “Top” “Right” “Bottom” boxes.
DO NOT PRINT YET!!! DO NOT MAKE ANY CHANGES UNTIL PRINTED!!!
Step 8: Time to prepare the fabric! After I just said not to print yet… I did print lol. I used my mistake to size the fabric needed for my image. Yes… I did go above and beyond what I needed, but I figured for the first time, I better have more than not enough!
Step 9: After ironing the fabric, I cut a piece of Clean Cut Fabric Interfacing just a bit smaller and ironed it on for a couple seconds (interfacing adhesive – rough – side down on top of the fabric). Remove interfacing liner.
Step Ten: Because I already did an oops print and cut, I had a guide to help me place my image on the paper. I could see where the registration marks would print, and I wanted to avoid putting tape in those areas. I simply used Scotch tape to secure the fabric on the copy paper. MAKE SURE THAT YOU’VE ALREADY IRONED ON THE INTERFACING (oh, if you only knew my boo boo’s LOL).
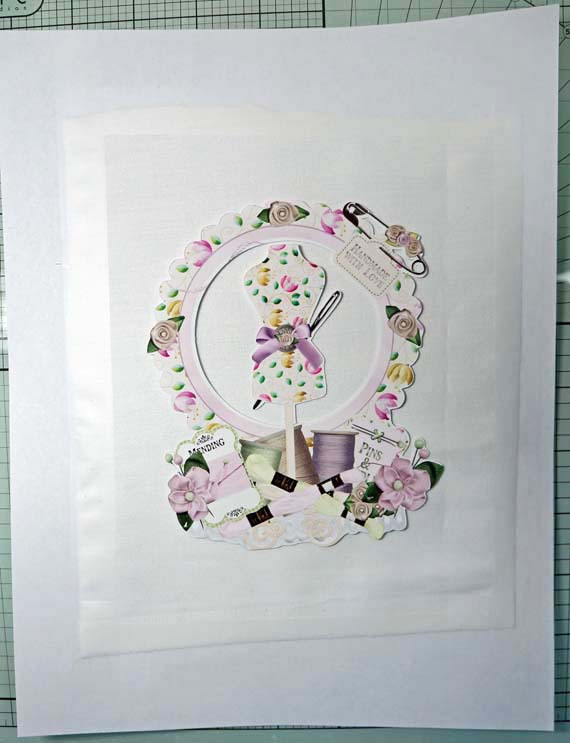
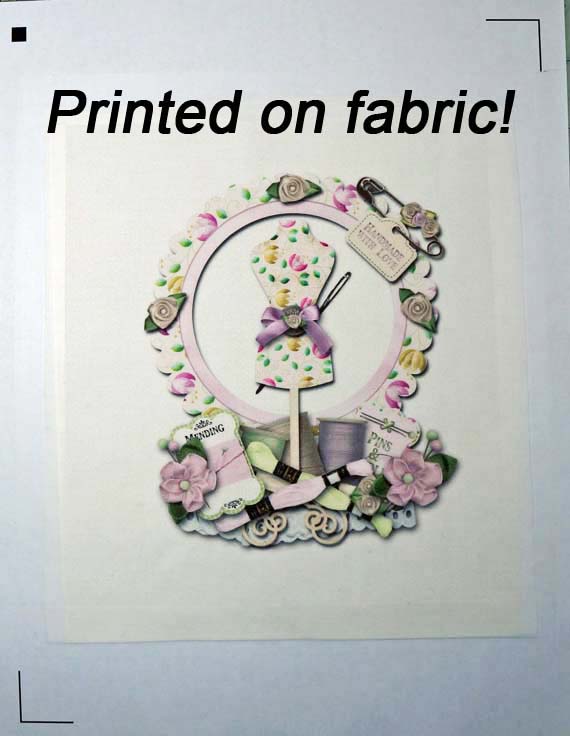
Step 11: Insert into your printer (my printer requires I place the paper face down, but yours may be different). Next, click on “Print” in your Silhouette Software and follow instructions for your printer. Praying helps at this point LOL! I actually was very pleased and surprised at how effortlessly this step went. I was imagining paper getting caught and tape gumming up the printer, but nope, worked like a charm!
Step 12: Place printed fabric on your cutting mat the same way it shows in your Silhouette Software. Load the mat into your cutting machine. For BEST results, use a dedicated blade for fabric. Silhouette manufactures the “blue” fabric blade. It’s the same as the original, but for ease of knowing which to use for fabric and which to use for paper, I find it a very nice feature indeed 🙂
Step 13: Cut settings should be as follows: “Fabric Cotton Print” and Blade 3
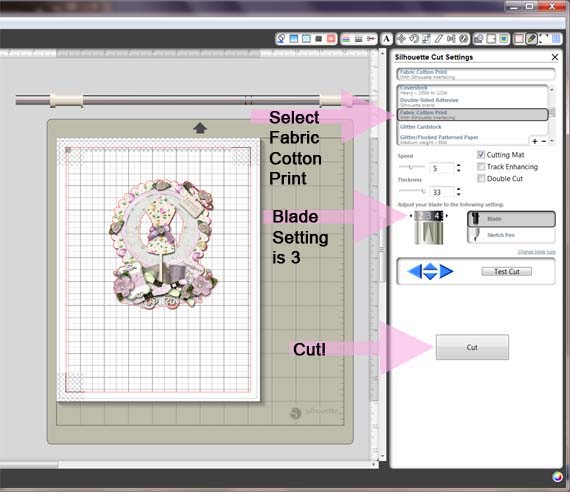
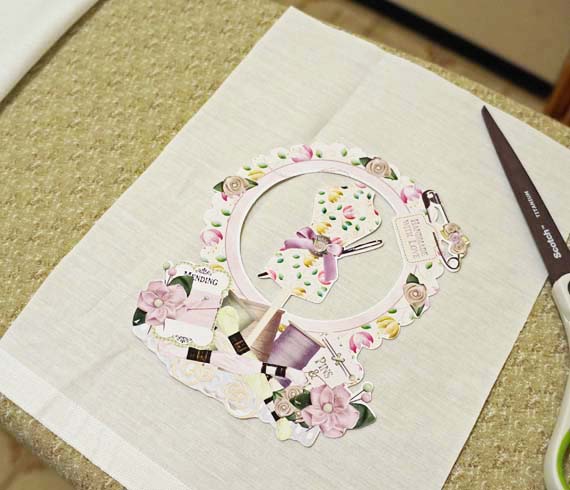
Step 14: Cut! Unload mat from cutting machine and peel away fabric – clean cut!!!
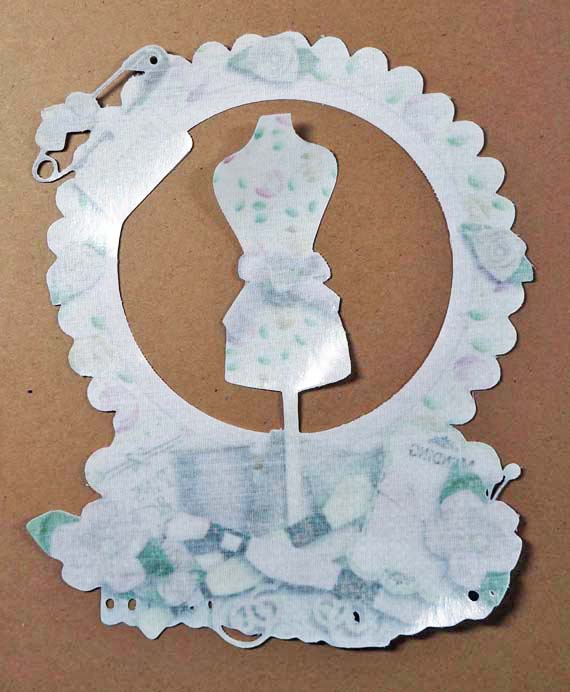
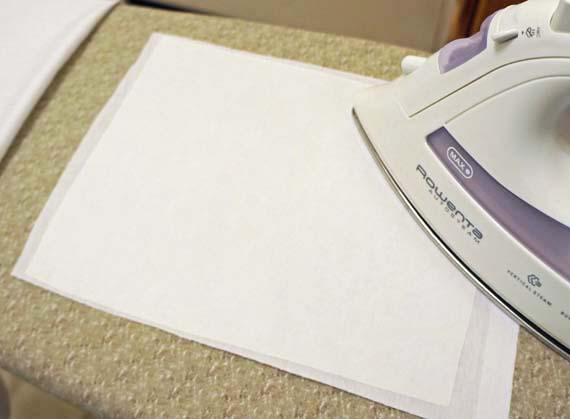
Step 15: Using a clean cloth, place over your print and cut fabric (interfacing side down on top of your project) and press for about 8 seconds with a hot iron (no steam).

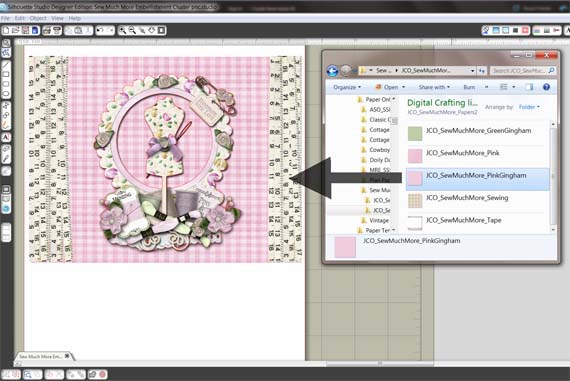
Step 16: To create my background, I used my Silhouette Software for easy designing. Opening the files I wanted, I used the drag and drop technique to place the papers on my virtual mat. From there, I measured my frame and sized the papers accordingly.
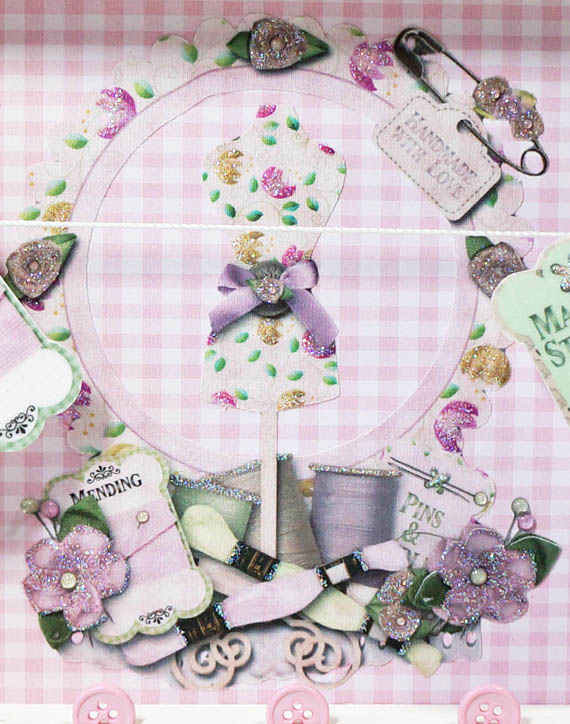
Step 17: Print and cut additional embellishments using fabric and/or papers. Decorate frame as desired.
Now it’s your turn! We’d love to see what you create using the Print and Cut feature and Clean Cut Fabric Interfacing. Please share with us at Scrap Girls Hybrid Gallery. Enjoy!!!

Tutorial written by Lori Aragon

Silhouette fabric project bundle
- Silhouette sewable fabric interfacing (36 in x 17 in)
- Silhouette clean cut fabric interfacing (36 in x 17 in)
- $25 download card to Silhouette Online Store
- Silhouette fabric blade
Regularly $53.97 $29.99 with promotion code
Silhouette Portrait® fabric project bundle
- Silhouette Portrait®
- Silhouette Portrait® electronic cutting tool
- Power cable/AC adapter
- USB cable
- Silhouette Studio® software
- $10 download card
- 8 in x 12 in cutting mat
- Silhouette blade
- Basic Instruction Guide
- Portrait instructional DVD
- Silhouette sewable fabric interfacing (36 in x 17 in)
- Silhouette clean cut fabric interfacing (36 in x 17 in)
- $25 download card to Silhouette Online Store
- Silhouette fabric blad
- Silhouette Portrait® fabric project bundle
Silhouette CAMEO® fabric project bundle
- Silhouette CAMEO®
- Silhouette CAMEO® electronic cutting tool
- Power cable/AC adapter
- USB cable
- Silhouette Studio® software
- $10 download card
- 12 in x 12 in cutting mat
- Silhouette blade
- Basic Instruction Guide
- CAMEO instructional DVD
- Silhouette sewable fabric interfacing (36 in x 17 in)
- Silhouette clean cut fabric interfacing (36 in x 17 in)
- Long cutting mat (12 in x 24 in)
- Silhouette fabric blade
Regularly $348.95 $269.99 with promotion code
To take advantage of these great offers visit this link, choose your bundle and use this code: SCRAPGIRLS.


