It’s never too late in the year to start your album!
Confession: While I have finished my albums every year since 2009, I am never up-to-date on the current year and do some major catch-up scrapping the week after Christmas every single year.
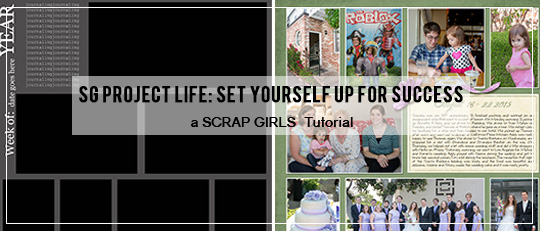
In this tutorial, I’ll give you some tips on how to set yourself up for success in creating your album and show a few ways you can switch up templates to keep your pages fresh along the way.
1. Organize your photos.
I have photo folders for each week of the year because that is the way I scrap my pages. (I used to organize them differently, but adapted my folders to make it easier to get my layouts done.) You’ll want to organize your photos the way that works best for you. When I upload photos from my camera and phone, or when I grab my kids’ photos from Facebook, I drop the photos into the folder for whatever week it was taken. When I go to work on the page for that week, all the photos are in one place!

2. Keep up with the journaling, even if you don’t have time to scrap.
Writing my journaling while it’s still fresh is a must for me. I keep a Word document open on my computer and try to update the journaling at least once a month. If I go longer than that (and I sometimes do), I tend to forget things! I always open the photo folder for the week (see Step 1) to get myself started. Using my appointment calendar is another great way to jog my memory if I’ve forgotten to journal.
3. Use the same font for journaling throughout the entire album.
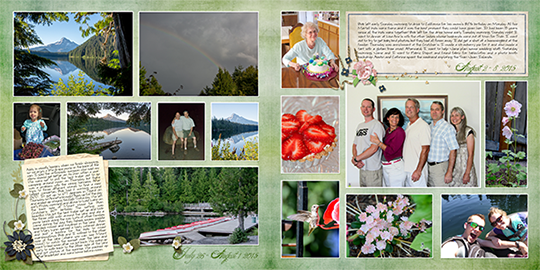
Choose a font that is easy to read and make sure the font has any special characters you regularly use. You will also want to keep the font size consistent from page to page. This year, I used Lettering Delights Scrap Casual Font for my journaling.
4. Keep the embellishments simple.
This is especially important when using a lot of photos on your page. It not only keeps the focus of your page on the photos, it also takes less time! For my pages, I like to anchor the journaling paper with simple embellishments or a small cluster.
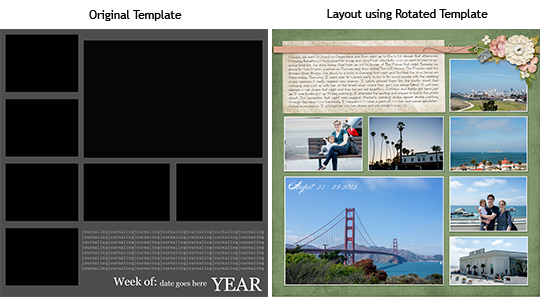
5. Use templates and don’t be afraid to alter them to fit your photos.
There are a lot of templates in the Boutique that are designed for weekly or monthly pages. Choose the ones that work best for you. To get extra mileage out of your templates, you can rotate or flip the entire template, or you can remove a horizontal photo and replace it with two verticals. You can replace vertical photos with multiple horizontals as well. This simple method keeps your pages looking fresh. The examples below use templates from ScrapSimple Digital Layout Album Templates: Album Series 5 by Angie Briggs.

6. Format your pages for the printing method you plan to use.
Most printing sites have a template you can use to see the trim lines and make sure nothing important is cut off your pages. The first year I created an album of weekly pages, I chose the printing site at the end of the year when I was ready to print. Unfortunately, I hadn’t factored in the trim lines and had to open and edit each page before I could upload it for printing. You might have noticed that my layouts have wider margins than their corresponding templates in the screenshots. That is because, when I create my pages, I use a template showing the trim lines from the site I plan to use for printing so I won’t have to fix each page later.
7. Have fun and ask for help if you need it!
Enjoy the process of creating your pages. If you have questions or need help with anything scrapping-related, just ask on the Scrap Girls Forum. We love to answer your questions and we’d love to see your completed pages in the Scrap Girls Project Life 2016 Gallery.