
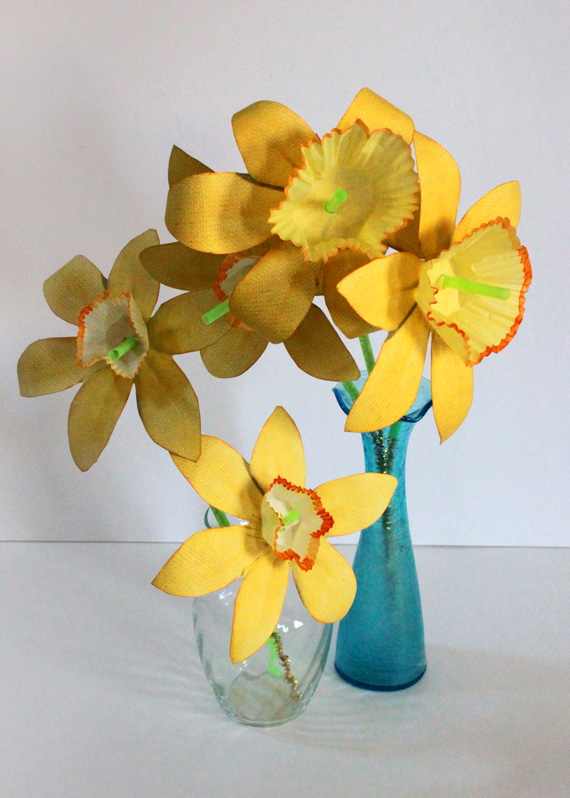
My very favorite part of spring is the flowers! I can’t wait to see the crocus, tulip and daffodil buds opening, washing the world in bright colors! This winter seems like it keeps going on and on, so I decided to bring a little spring inside before Mother Nature was ready. I made some paper daffodils that are so easy, the whole family can make them!
Here’s what you’ll need:
Printer
Cardstock
Paper Baking Cups, two sizes
Green Straws, Pipe Cleaners or Floral Wire
Food Coloring
Distress Ink
Scissors or Craft Knife
Glue Dots
Small Dish or Plastic PlateWater
Pencil or other round object for rolling the petals
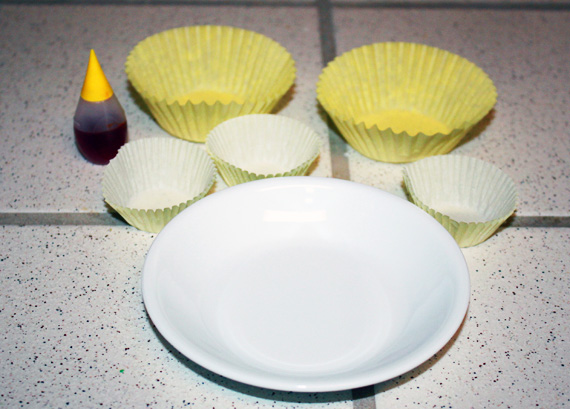
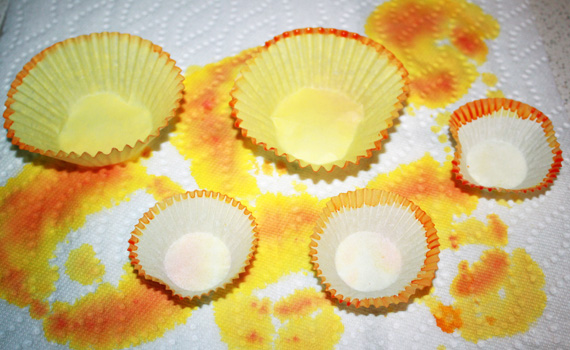
To get started, I chose 2 different sizes of baking cups. Any color will work, but I used yellow. In a small dish or plate, I mixed in some drops of yellow food coloring and red food coloring and mixed in a little bit of water. How much of each depends on the shade of color you want and how bright you want it. Dip the edges of the baking cup into the food coloring and let it sit for a bit. It takes a minute for the paper to absorb the water. The longer you leave it in the food coloring, the more color you will have on the edge of the cup and it will be darker.
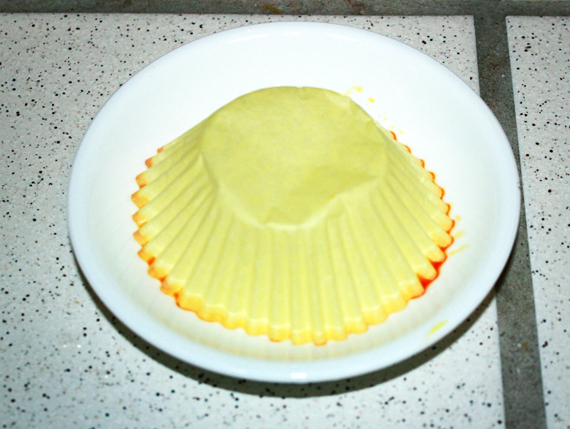
After dipping the baking cups, set aside to dry.
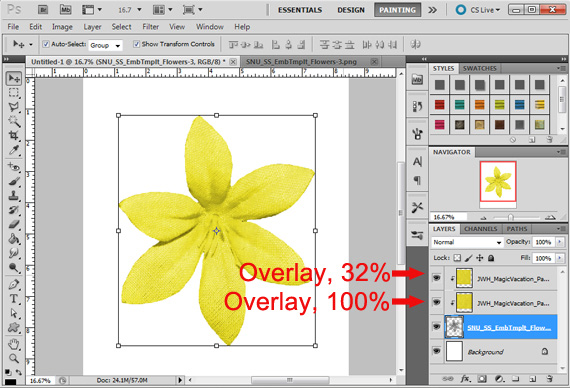
While the cups are drying, open up a new letter sized document in your digital scrapbooking software. A daffodil has 6 petals, so I opened up Syndee Nuckles’ ScrapSimple Embellishment Template: Flowers Biggie and chose number 3. I resized the template to 6.25 inches wide. Next, I found a yellow paper in Julie White’s Magic Vacation Collection that I really liked and clipped that to my template. I changed the blending mode to Overlay, Opacity at 100%. Then I duplicated that layer and changed the new layer to Overlay, Opacity at 32%. This took away the grey tint to my flower.
I printed two copies of that flower onto cardstock. Then I reduced the size of the template to 5.75 inches and printed 3 copies. I cut each one out and inked the edges with distress ink. Then I rolled the petals back using a pencil for a little dimension.
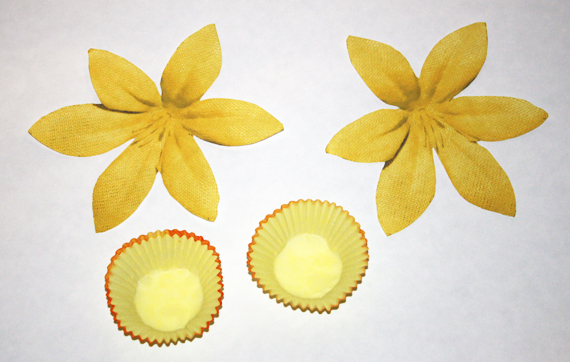
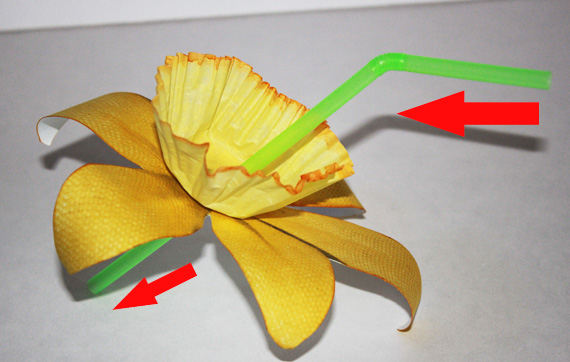
I attached the smaller sized baking cup to the smaller flower using glue dots, being careful not to place a glue dot in the middle of the flower. Once attached, I cut a small “X” in the center of each flower so I can place the stem there. I used green plastic bendy straws for a fun look that the kids loved! Make sure to put the long end of the straw through the front of the flower so any flaps are pushed to the back and out of sight. You could also use pipe cleaners or floral wire as well.
Once you assemble your flowers, add them to a vase and enjoy! It’s really that easy to bring in a touch of spring! We’d love to see what you create, so post some photos of your finished projects in the Scrap Girls Hybrid Gallery.

Tutorial Written by Carla Shute
Digital Supplies Used:


