
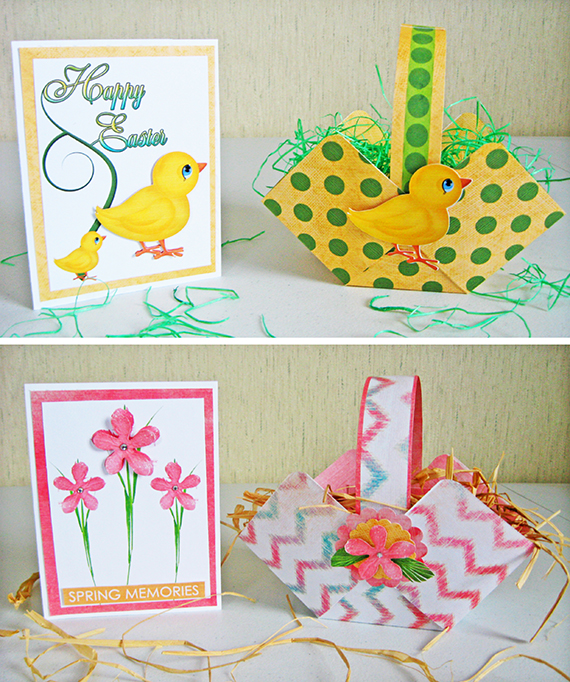
This printable basket and card set is so easy to make! They can be tailored to fit any occasion, just choose your favorite digital scrapbooking collection, and let the fun begin. I have created 2 samples for you; one to give to a child and one for an adult. What a fun, easy, and special way to let someone know that you care enough to make them a handmade gift!
Digital scrapbooking products used:
ScrapSimple Craft Templates: Basket
Signs Of Spring Collection Biggie
Craft supplies used:
8.5 x 11 cardstock for printing
Paper cutter or scissors
Sticky Strip Tape or Other Adhesive
Score Board or Ruler and Bone Folder
Corner Rounder
Gems
Pop Dots
Creating the Basket:
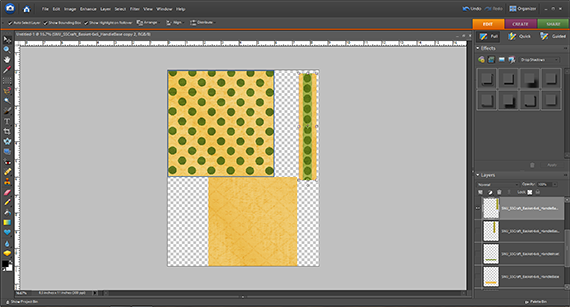
Step 1 – Create a new blank document in your photo editing software Start measuring 8 1/2 x 3 1/2 inches. Open up the ScrapSimple Craft Templates: Basket file and drag the pngs for the basket and the handle to a new blank document. Next, drag your choice of digital scrapbooking papers and clip them to the pngs using a clipping mask Opt+Ctrl+G (Mac) Ctrl+G (Win) and then merge those 2 layers. Do the same for both layers of the basket handle then layer and merge the two layers together.
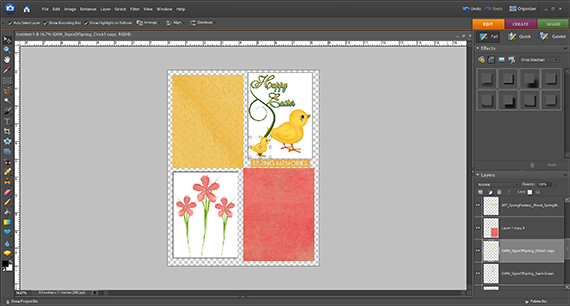
Step 2 – Arrange the basket pieces on the document to create a printable.
Step 3 – Print onto medium weight matte photo paper or cardstock.
Assembling Your Basket:
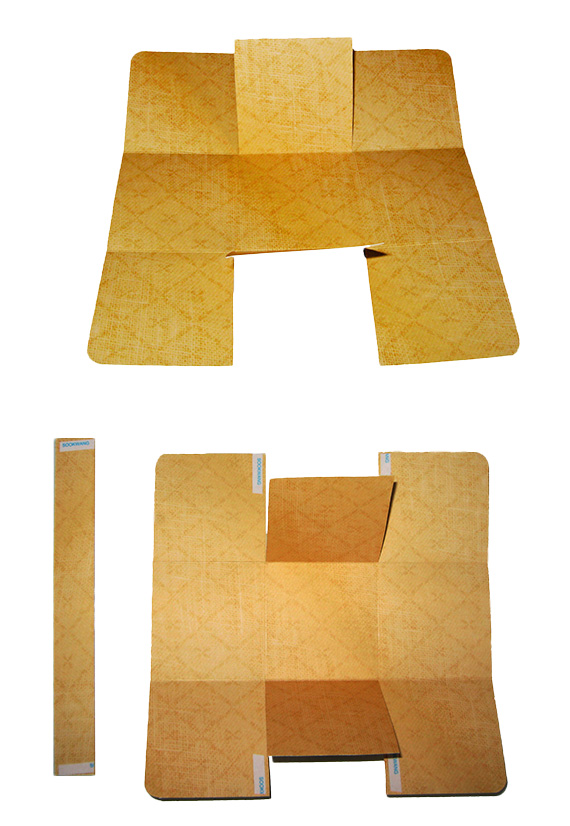
Step 1 – Cut out the pieces for your basket and handle. If you want rounded corners for your basket make sure to snip your 4 corners now.
Step 2 – Place the paper for your basket onto your scoreboard and score at 2” and 4”, turn your paper once and again score at 2” and 4”, when your scores are finished you will have 9 squares.
Step 3 –After you have completed scoring, fold on your score marks then take your scissors and cut on the 2 inner folds on opposite sides. Place score tape (or adhesive of your choice) on the top inside of the outer 2 squares, close to the cut line and on the inside ends of the handle.

Step 4 – Choose your digital embellishments that you want to use to decorate your baskets, arrange on 8.5×11 sheet, print and cut out.
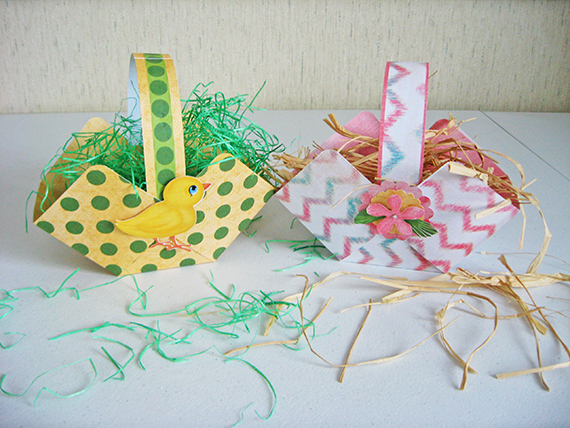
Step 5 – Decorate your basket with printed elements and craft supplies.
Creating the Coordinating Cards:
Step 1 – In your photo editing program create a 3.75 x 5 blank document and drag your choice of digital scrapbooking papers over, this becomes the card matte.
Step 2 – Create a new blank document in your photo editing software Start measuring 8 1/2 x 3 1/2 inches. Drag over and arrange the card mattes and embellishments you want to use on your card.
Step 3 – Print and cut.
Step 4 – Create your card base by cutting an 8.5 x 11 inch piece of cardstock in half to make a 4.25 x 5.5 inches (A2 size) card. Step 5 – Assemble the cards.
I hope you enjoyed this tutorial and will give this basket and card set a try! Please share your projects in the Scrap Girls Hybrid Gallery.
Tutorial written by Sherry Davis


