
An Un-expected element for your Art Journal & Greeting Cards!
You are going to be surprised at how easy it is to construct these pop-up mechanisms! I am giving you 2 templates – one for what I call the “stand alone” mechanism and one for the “inset” mechanism. Both are interchangeable depending on your preference. If you are fortunate enough to have a Silhouette cutting machine, these templates are very easily adaptable to making a cut file. I drew them with the usual colors, red for cut lines and blue for fold lines. My directions in this tutorial are for those of you who have to cut with an Exacto blade and scissors.
We will start with the “stand alone” template that I used for my Art Journal spread. I strongly recommend that for at least the first 3 or 4 projects, you use the templates I have provided. Just until you get used to size and placement of the mechanisms and elements in your project. Then you can fiddle around with changing anything you want to!
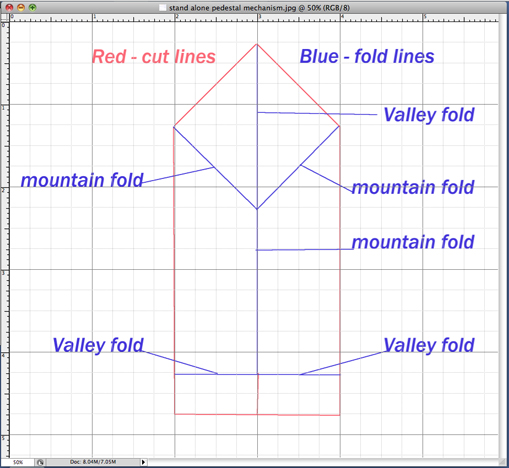
Trace and cut out the template on to at least 65lb weight cardstock, fold so that it looks like this:

Place and mark on the center crease of your project, don’t glue yet – you want to design your spread first!
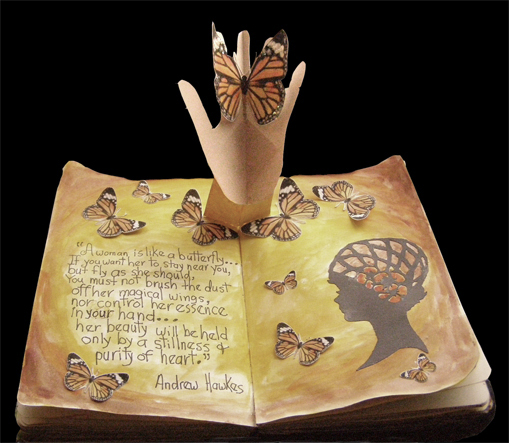
For my AJ, I marked where I wanted the mechanism to be, then lightly drew the circular movement I wanted with an H3 pencil. I used Koi pan watercolors for the background, then wrote the quote using Pitt pens.
In PS I used the custom shaped tool, hands. I stamped our several sizes using a flesh fill color, cut them out deciding what size fit in the already cut out mechanism. I used Elisha Barnett’s Brush Set: Papercut Ladies brush set and stamped several sizes of my chosen lady on to a 8.5″ x 11″ file in PS. You can have her totally black like a typical silhouette, or keep the cut out areas white like I did, that way I was able to add color, print, and cut out.
I scraplifted a monarch butterfly from Syndee Nuckles’ Noteworthy Embellishments and printed out a whole bunch of sizes. I have a Silhouette and was able to create a print & cut file to make life a lot faster! (Don’t forget to print out a sized butterfly that fits scale wise to the hand). The butterfly shapes are simple enough to cut by scissors, just takes more time.
Glue the hand into the mechanism. Then glue the mechanism into your spread, making sure when it’s closed, nothing sticks out. Glue in your lady, then your butterflies. HINT…don’t glue the butterflies flat! a line of glue down the center is fine, then lift the wings slightly up. One of my favorite AJ spreads!
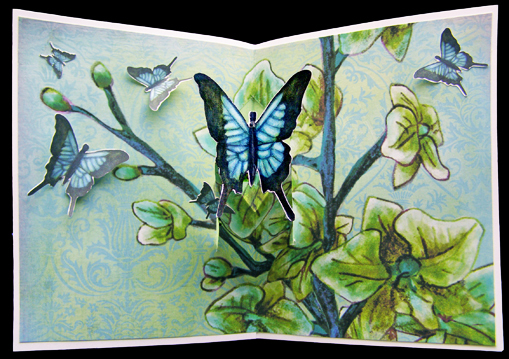
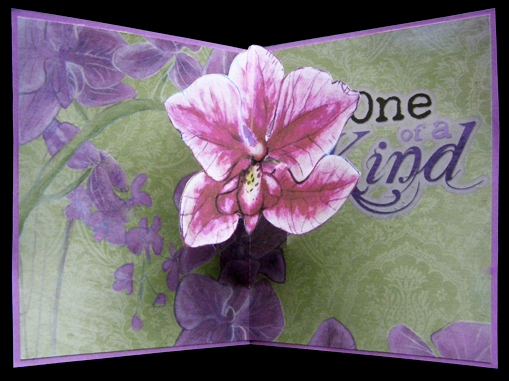
Examples: Blue Butterfly, One of a Kind and Cluster pop-ups use the “inset” mechanism.
In Your photo editing software (I use CS4) Create a new file that measures 1/4″ inches all around smaller than that of the the size of card you are designing. I used the A2 size, which is 8.5″ x 5.5″ inches finished – that means that my inset design measurement is 8.25″ x 5.25″ inches. Design and print, then cut out. Fold in half.Cut out your template that I have provided you.
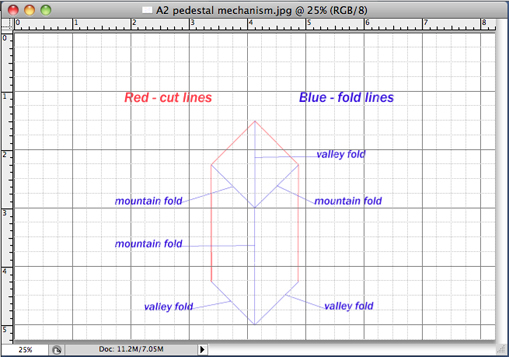 Trace it on to the back of your inset design…score where the blue lines are and cut the red lines.

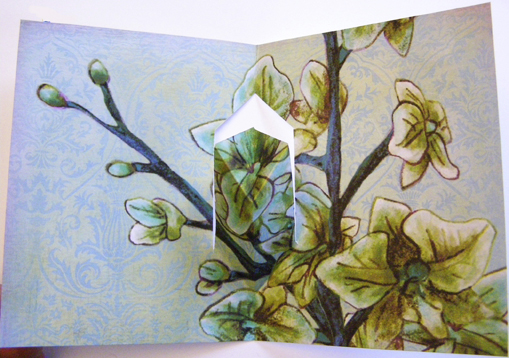
Fold according to the template so that your inset looks like this:

Flip your inset over (I used the Blue Butterfly design for this example.) It should look something like this:
For the outside of the card you will have 3 choices:
NOT TO PANIC! With the A2 size, the outside of the card measures 8.5″ x 5.5″ inches, you have the option of using a coordinating color card stock, white cardstock or a custom designed pattern. I don’t like to use a contrasting color for the front of the card because where the mechanism is cut out on the inside, the front color will be exposed and will be very distracting. One way to fix this problem when using white cardstock, is to create a rectangle using the rectangle shape tool on the backside of the front of the card in PS. Using the eye dropper tool, select a co-ordinating color from your inset design and fill.

Keeping the size of the rectangle slightly bigger than the hole created by the mechanism, print and the design the front. When you are happy with your design cut out, then glue the inset into the front cover. Finished Blue Butterfly design:
On the One of a Kind and Cluster examples, I used a coordinating color card stock for the fronts of the cards.

Digital scrapbooking supplies used:
Art Journal Pop-Up


Blue Butterfly & One of a Kind Pop-Ups

Cluster Pop-Up
See you next month!
-Jerrie

Tutorial written by Jerrie Hall


