

A New Twist on Hybrid Cards!
I love to make cards using my digital scrapbooking and paper supplies! While surfing the internet recently, I discovered there are more styles of cards than just the average greeting card. The style that caught my interest were Easel Cards. They have a built in easel to display your art! There are many different sizes and shapes you can make, but for this tutorial, I choose to make cards in the A2 size (5.5 in. x 4.25 inches) because that’s what size envelopes I have.
Digital scrapbooking supplies used:
Printable Card Kit: Birthday
Assemble Your Own Cards: 5×7 Super Heroes
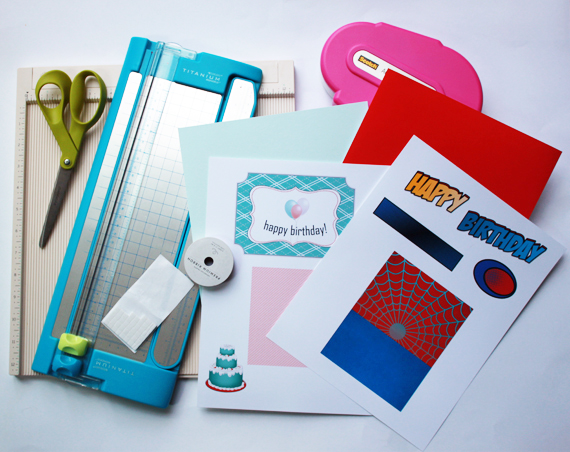
Supplies used:
Double Sided Tape
Ruler
Paper Trimmer
Score Board and Bone Folder
Scissors
Pop Dots (dimensional dots)
Letter Sized Cardstock
Printer
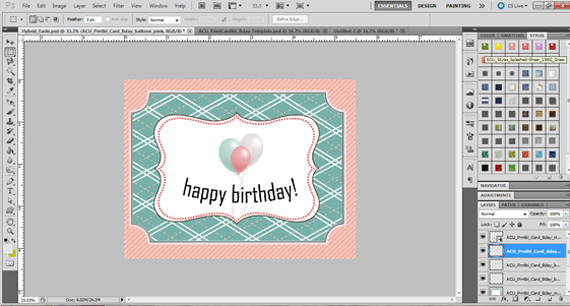
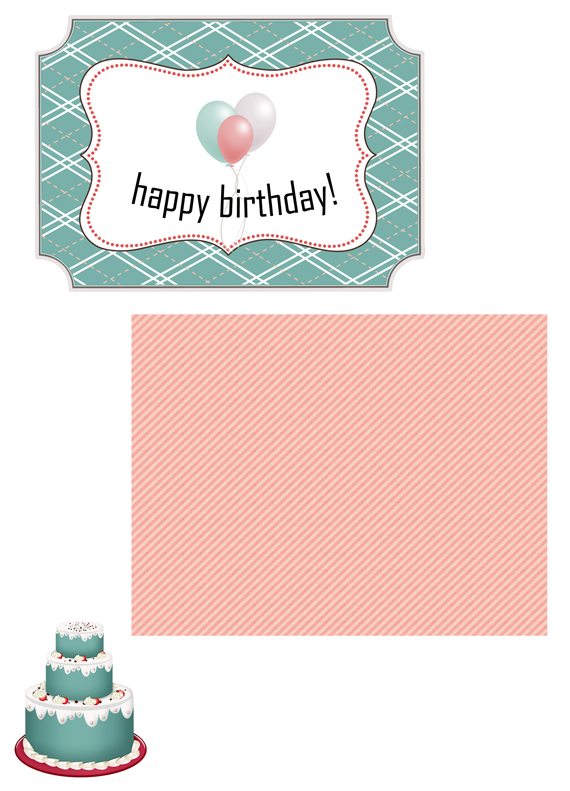
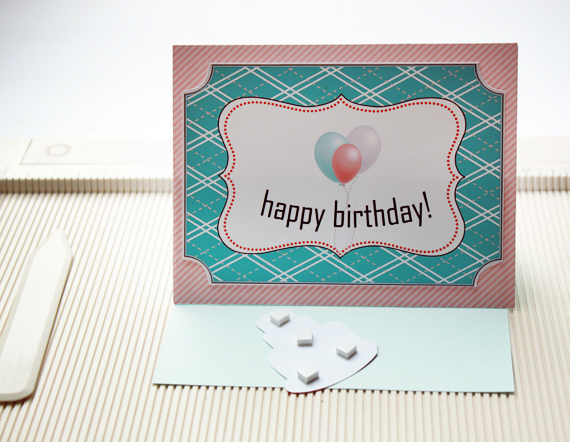
Let’s start with the horizontal card first. I opened a new document in my digital scrapbooking software, width of 5.5 inches, height of 4.25 inches and 300 dpi. I chose to use Armi Custodio’s Printable Card Kit: Birthday because she has background papers, mats and other embellishments that all coordinate. I created a card that I liked and saved it in a layered file.
I knew I wanted to print out the mat separately from the background so I created a blank document the size of a piece of printer paper. Then I clicked on each layer and dragged them over to the new document. I also chose an embellishment to act as a stopper (more on that later).
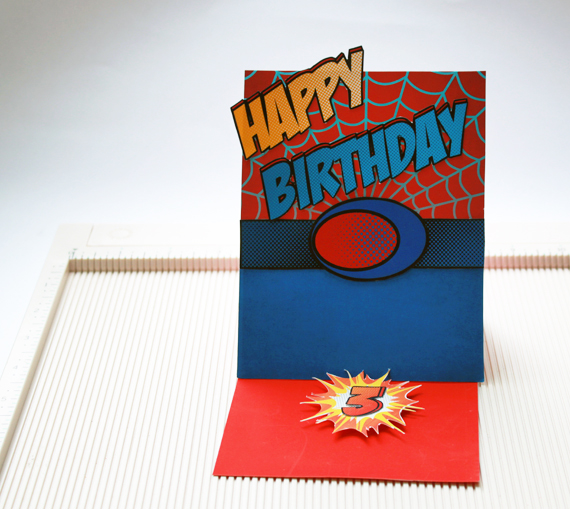
I like to print all of my cards and pieces at once, so I repeated the steps above to create another card that will stand vertically. The dimensions of this card is a width of 4.25 inches, height of 5.5 inches and 300 dpi. I had my nephew in mind for this card, so I used Armi Custodio’s Assemble Your Own Cards: 5×7 Super Heroes. Again, I assembled the card, then printed the pieces separately.
Now the fun really begins! I assembled my cards using double sided tape just as I had planned in my digital scrapbooking software. For my horizontal card, I chose a piece of cardstock from my stash for the easel. I trimmed the paper to 5.5 inches X 8.5 inches. You can make two easels from one piece of cardstock. Then I scored the easel paper at 4.25 inches and 6.125 inches.
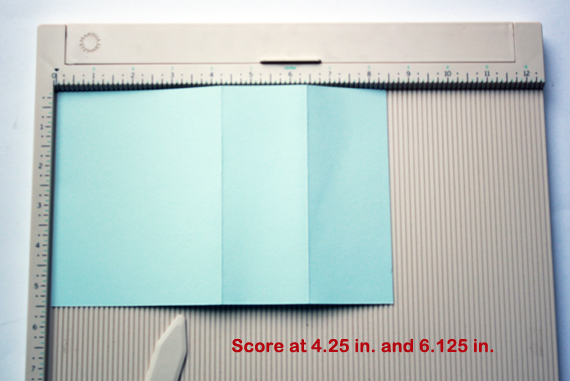
Then I folded the paper in half on that first score mark. Then I folded the second score mark to form a triangle.
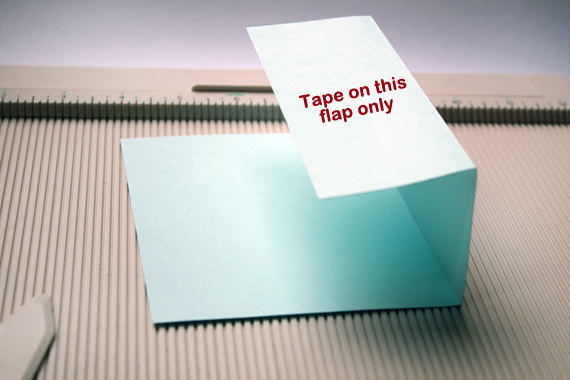
I added double sided tape to the bottom of the flap as shown in the photo above. I lined up the bottom edge of my card to the bottom edge of the flap. The card is only taped on the bottom half, so be generous with your tape! Now, you may have noticed that the card will stand up on it’s own, but slides down pretty easily. It needs a “stopper” to keep it standing up! You can use word art, embellishments, buttons, brads…anything you’d like as long as it has some height to it. I used a cake from Armi’s Printable Card Kit: Birthday to act as a stopper. Placement of the stopper is completely up to you. I attached some pop dots to it and voila!

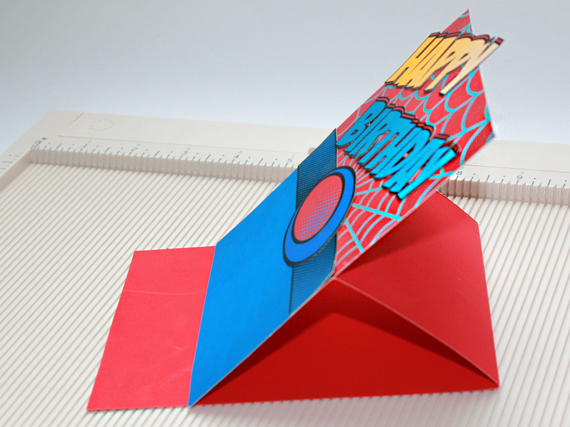
Now to finish the vertical card! For a base, I used a paper from my digital scrapbooking supplies, printed it out and trimmed it to 4.25 inches X 11 inches. I then scored the paper at 5.5 inches an 8.25 inches.

I folded the paper on the score marks just like I did for the horizontal card, forming a triangle. I added tape to the bottom half just like before.

To attach the card to the easel, I lined up the bottom edges again. The top half of the card will not be attached.
Once my card is attached, I added a stopper. When I’m ready to send these cards, I can write my sentiments next to the stopper, or above the stopper so it won’t be seen when displayed. It’s completely up to you! You may want to let the recipient know how to display the cards because it’s so unique!
I hope I’ve inspired you to try these next time you are in need of a card! If you do, please post it in the Scrap Girls Hybrid Gallery. We’d love to see it!

Article written by Carla Shute


