

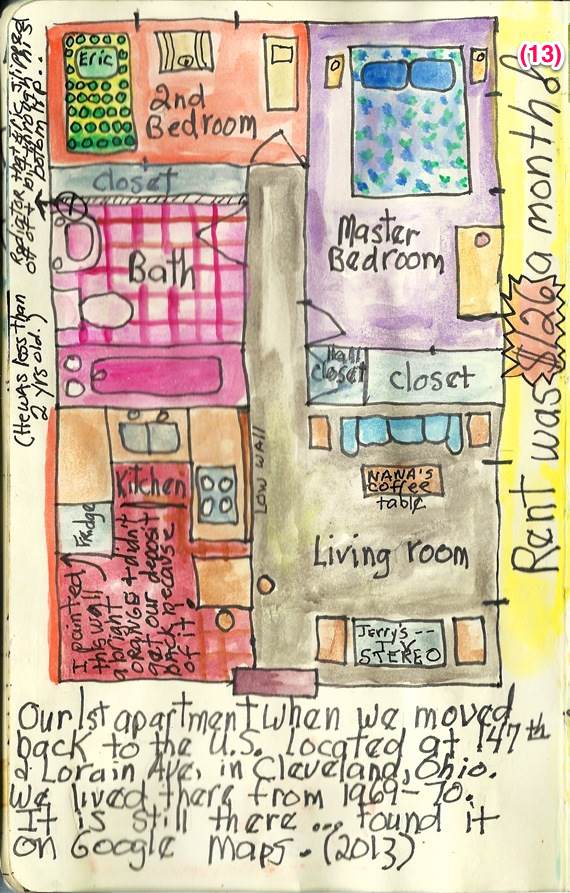
For this art journaling lesson I chose to remember the 1st apartment my husband Jerry (YES, I married a Jerry!), 1 year old son Eric and I lived in after moving back to the US from Japan.
Enough babbling…let’s get to it!
Digital scrapbooking products used:
Assemble Your Own: House and Home
ScrapSimple Embellishment Templates: House and Home
Brush Set: Stone Wall
Supplies used:
art journal or watercolor paper
watercolors and paint supplies
Pitt pens
water brush
adhesive
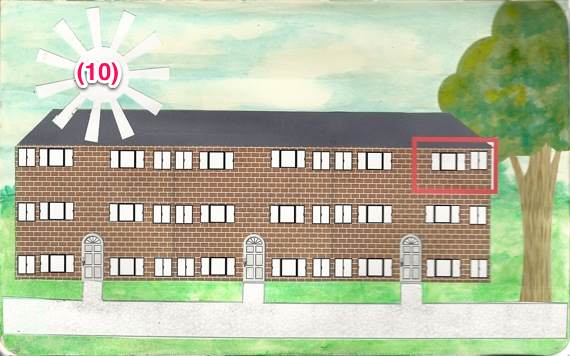
Part 1 -The Building
With Thao Cosgrove’s House and Home digital embellishments and Syndee Nuckles’ Stone Wall brush set, recreating my memory of what the building looked like was a snap! (though at my age, my memory is often suspect!) Everyone’s building will be different, the following is the process I went through.
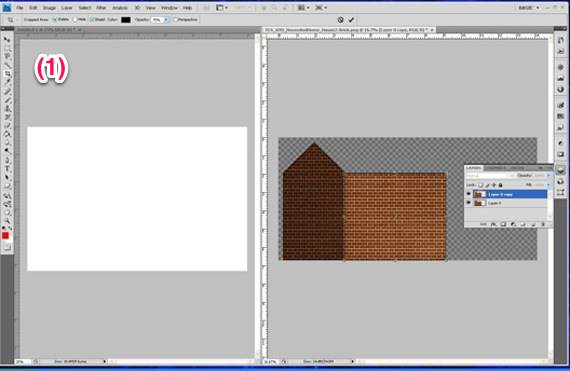
Open a new document in your photo editing software (I use CS4), the size of your journal page. Select the elements that you want or think you want to use. Duplicate and use the copy for your editing. Bring them onto your page individually, size and edit.
I just wanted the square section of this element, so I used the crop tool and highlighted the part I wanted I wanted to use and cropped.
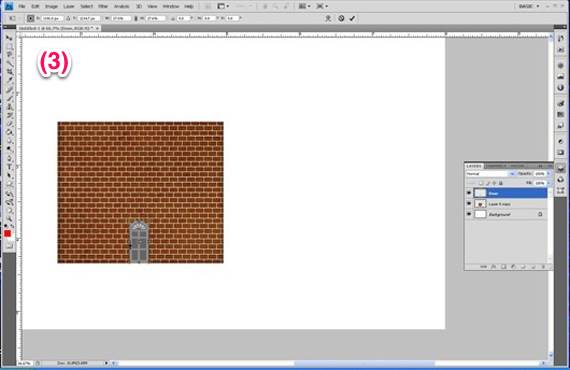
The next element I used was a door template. The template had multiple parts, but I liked the gray tones. I highlighted all the layers and duplicated them. Then I merged all the duplicates. I then dragged the door over to my page and resized it.

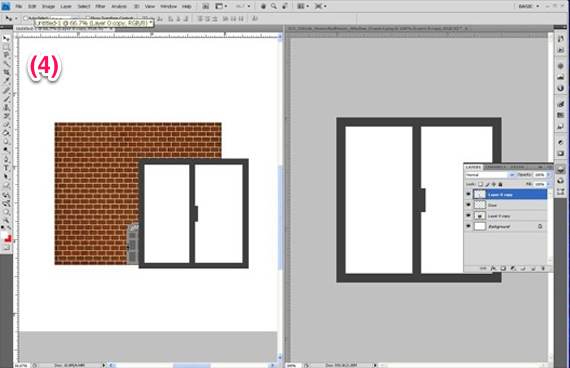
I used 2 kinds of windows; I handled both the same, so I’ll explain what I did 1 time. The templates have a transparent background. If I placed them as is on my building the bricks would show inside the window frame. All I did to fix that was to use my magic wand tool, clicked inside both frames to get the ‘marching ants’ and then filled with white. I brought the window over to my page and sized it, duplicated it 5 times & arranged them on my building.
One section of the building is compete. but I need 2 more. I merged all visible layers then duplicated that section 2 more times.
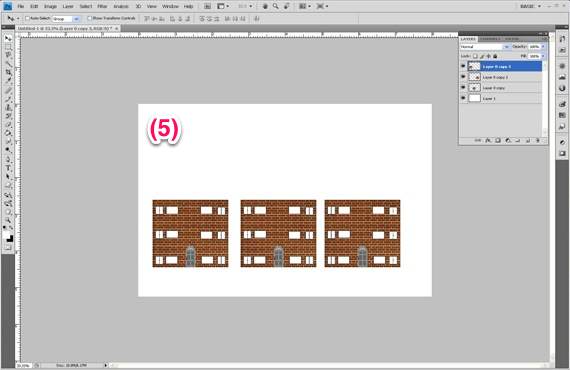
I then lined up the 3 sections and brought them together and merged. You’re probably wondering why I just merge the layers and don’t flatten; it saves me time incase I need to change something!
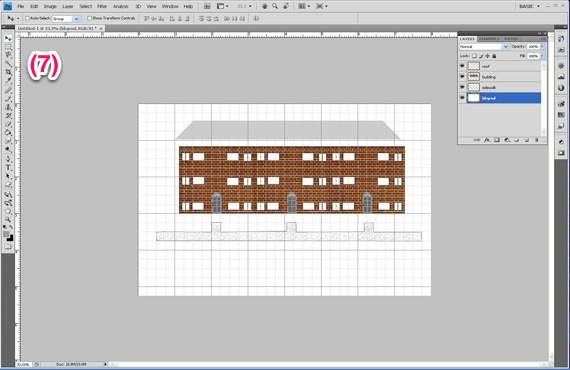
Now I want to work on the sidewalk. Turn on your grid. I have mine set on .25″ spacing. I lined up my building square to the grid lines. Click on the pencil tool and set the width to 3 to 5 pixels and set the color to a nice med. gray. I followed the grid lines, bringing up a square to act as an entry by the doors. I named this layer sidewalk. Now I want to add a stoney texture to the sidewalk. Open Syndee’s Stone Wall brushes. Create a new layer, you could name it texture. Set the color and size of the chosen brush, and start stamping away until the sidewalk area is covered. Looks really messy doesn’t it? Here’s how to fix that! Click on the pencil drawn sidewalk layer to make it active. Use your magic wand tool and click on the inside area. You will see the marching ants. Click on select and select inverse. Click on the texture layer and activate, click on the eraser tool and erase; you will notice that only the mess on the outside of the sidewalk lines will be erased!

I designed the roof like I did the sidewalk and filled it with the same color as the outline. This is what all 3 parts look like not merged yet:
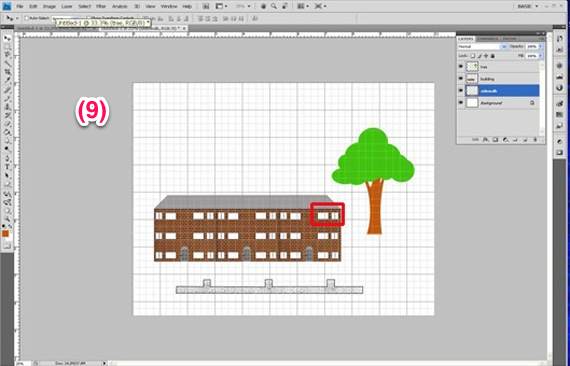
Merge the roof to the building, then bring out any digital scrapbooking embellishments you want to use. I wanted just a big tree. You can arrange an approximate layout of your page and print a copy for reference. 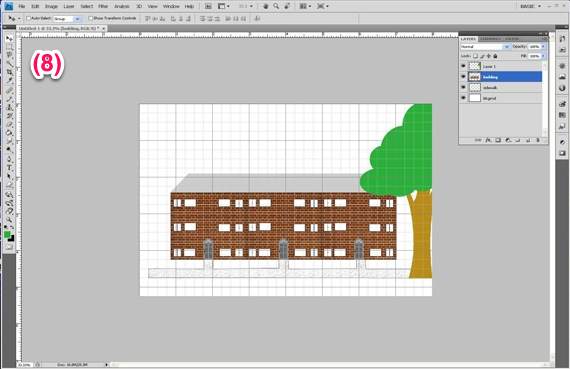
Open a new document the size of normal printing paper, 8.5″ x 11″ inches. With your layout page open on the same screen, click and drag each element on to the print document. I like to print 2 copies just in case I goof something up.
Cut your elements out. Arrange them on your art journal page. Decide on a horizon line, then get your painting mediums out & paint a background. I used my favorite watercolor pencils. Arrange, then glue your elements onto your page when dry. Fine tune your design; I made a blotch in the sky, so I added a sun! I also painted some shrubs.
You now have a finished art journal page!

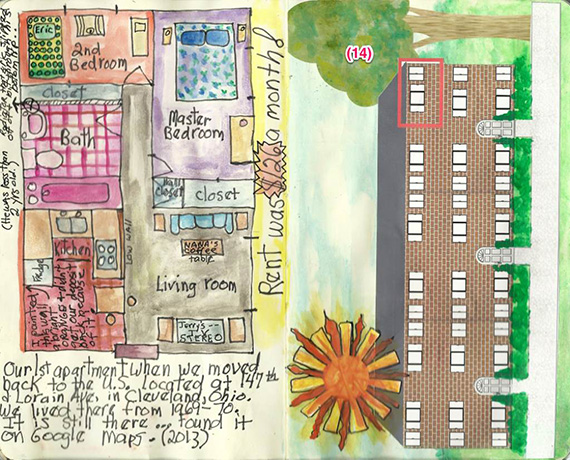
Part 2 – The Floor Plan
This part is completely done in your art journal. On the opposite page of your completed building, lightly sketch out the floor plan as you remember it. NO need to be totally accurate or in scale! When you are satisfied, go over your sketch lines with Pitt Pens, then erase your pencil lines.

I then painted in the rooms with my water color pencils, using a water brush. After it dried I added some journaling; little things I wanted to remember. VOILA! Another finished journal page!
And, VOILA! Again! A finished 2 page Art Journal spread – Scrap Girls Style!
Homework
Something I remembered from my childhood that I really had fun with! Paper Dolls! But with a fun art journal twist! Until next time…
Tutorial by Jerrie Hall


